

Drying Rack

Most of my life I have enjoyed process. I suspect many engineers can relate. When I graduated from college one of my classmates chided me when I expressed concern that work at a given company would be boring, “there is interesting code to write everywhere.”
He was right. In almost any situation I can find an engineering solution. Unfortunately the other side of this coin is that while I can find an engineering solution, that doesn’t mean it’s the right solution.
Writing code was my first serious interaction with a craft and the way I code and the way I learned to cut wood are basically the same: do some basic didactic things, focusing on the bare minimum process and improve from there. As I learn more about cutting wood I am forced to let process be subservient to outcomes. Just like at work, where I have to suppress my process preferences and favor outcomes.
Woodworking is a hobby and I intend to continue to enjoy process for its own sake, but with this project I got a taste of building something that I will use outside of the workshop. It excites me! What’s next?
My main project right now is a Gibson chair. The work is progressing but every now and then I get stuck. Most recently I made a small mistake boring a hole and need a round rasp to correct the angle the hole.
After hosting a Carnival celebration the Saturday after Mardi Gras (47 people in my apartment!) I decided to make something easy while I wait for the rasp to arrive.
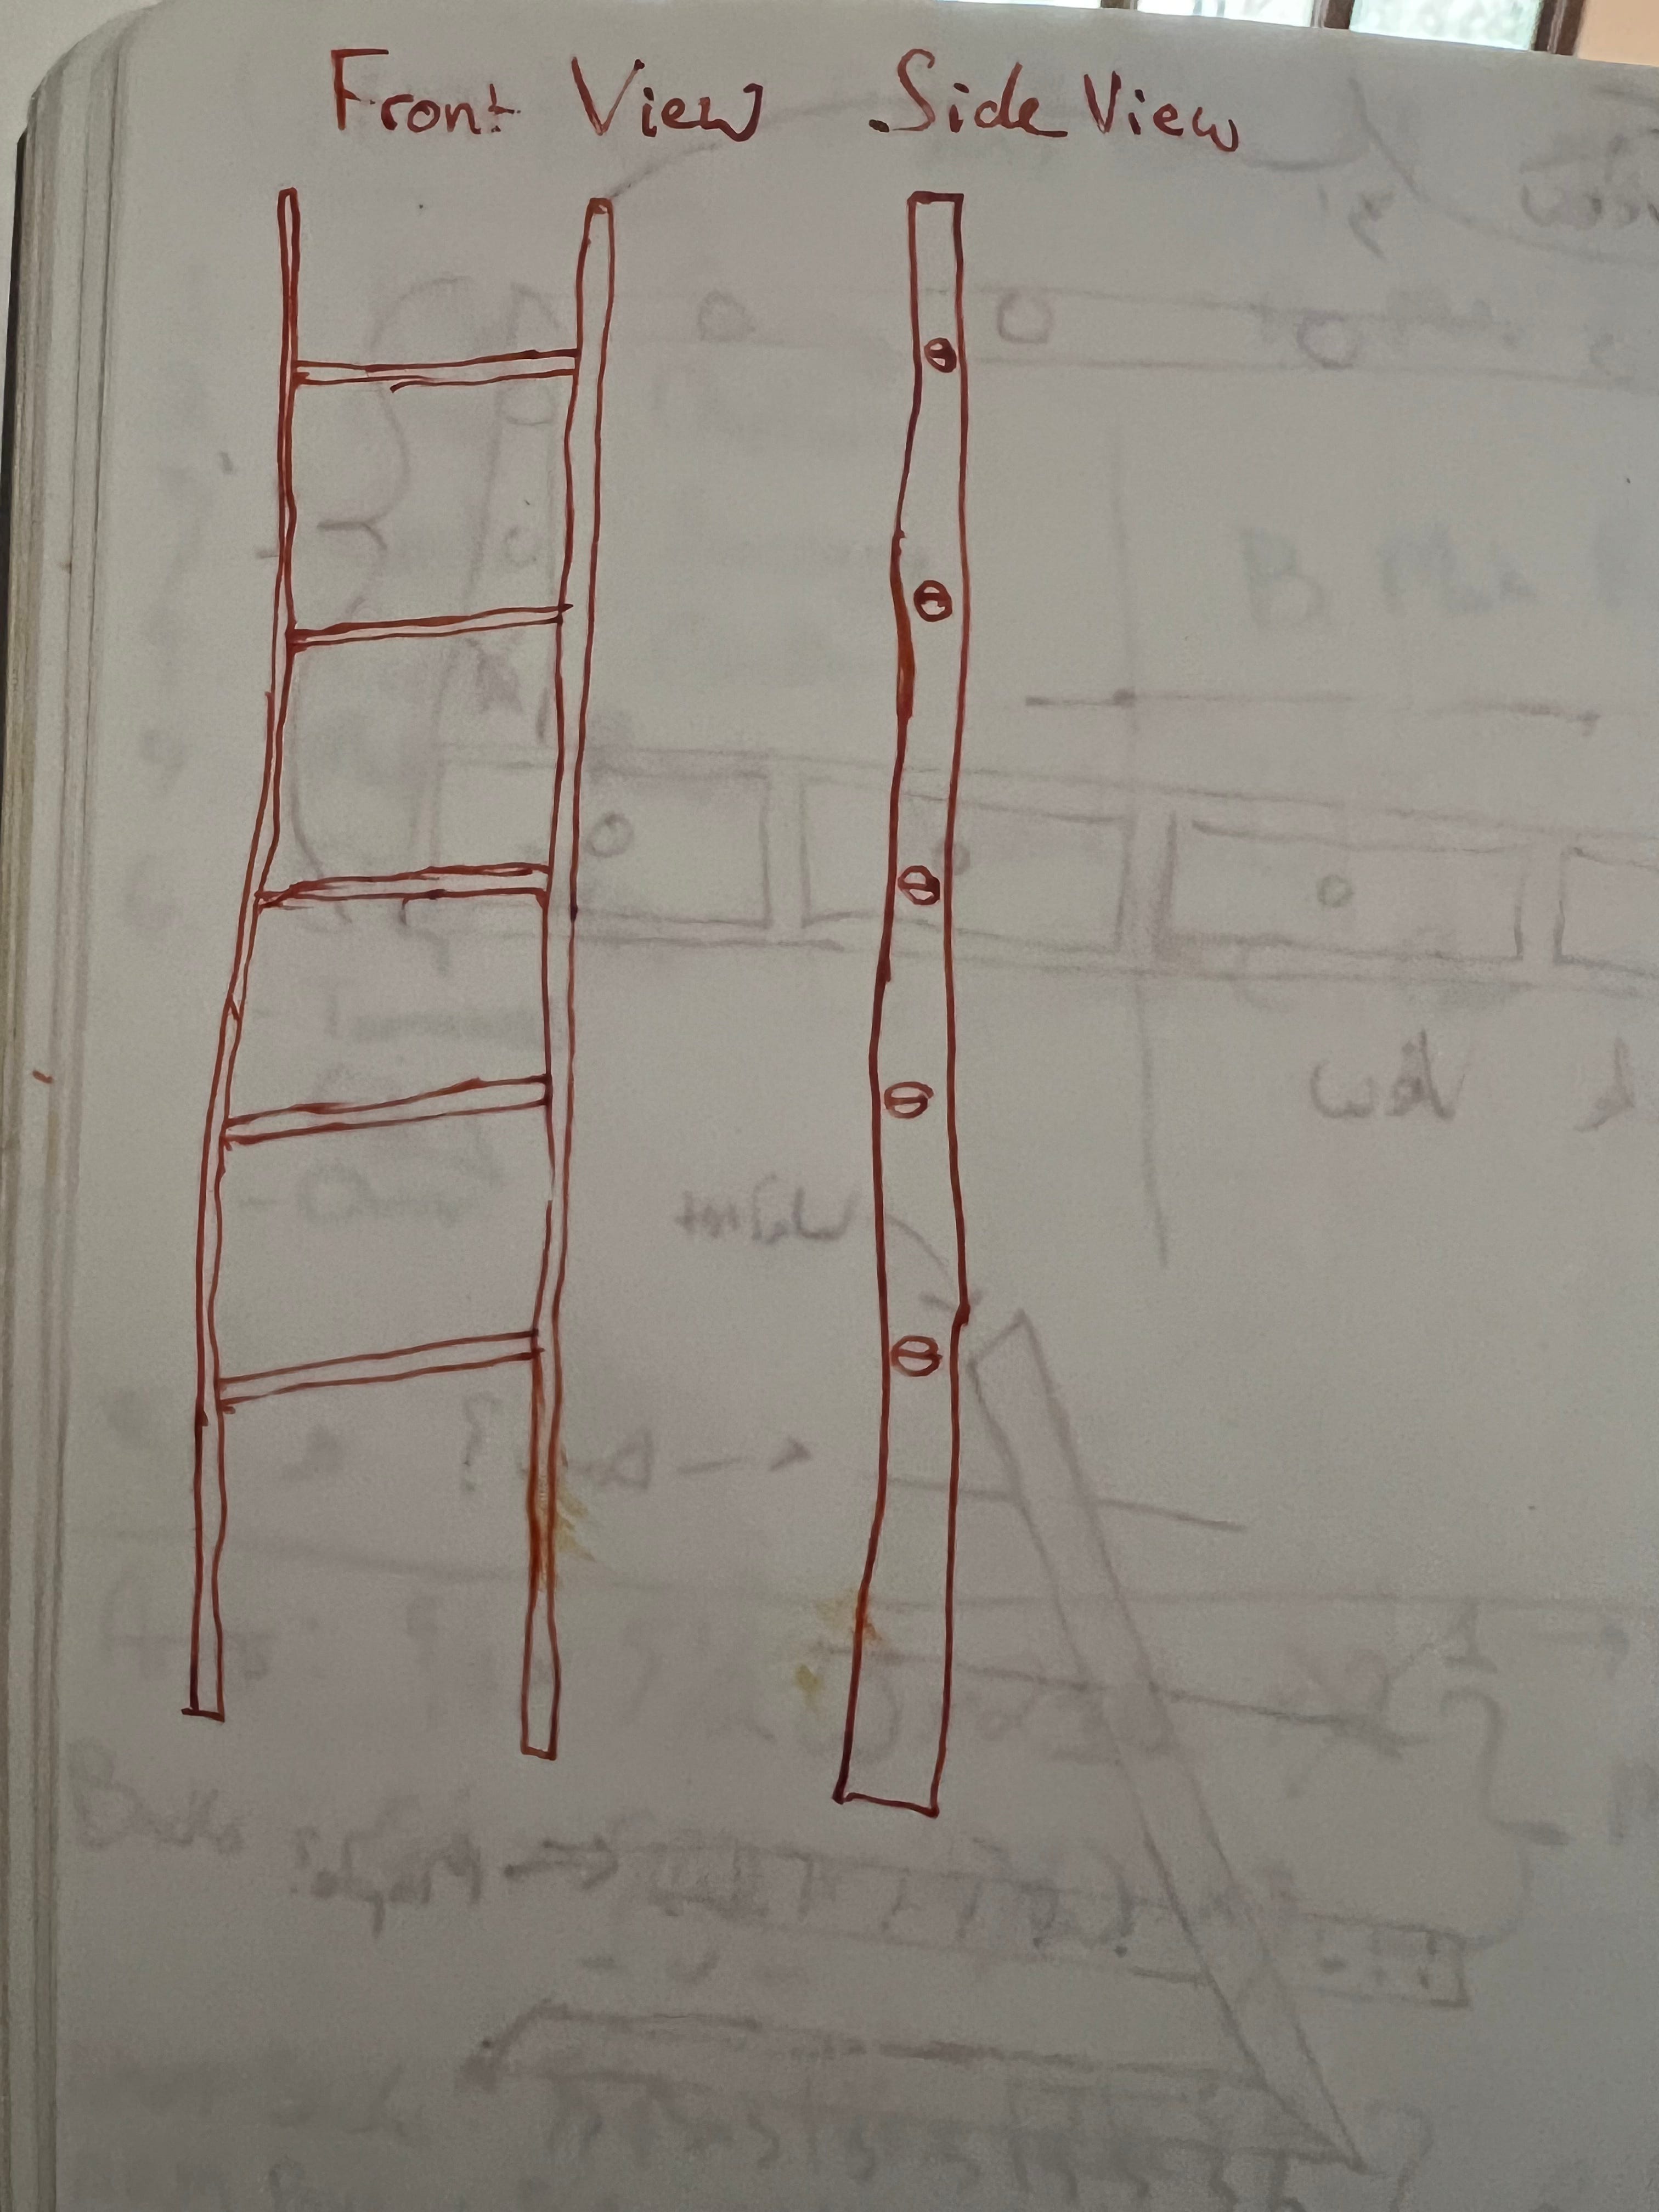
I started out by drawing a picture of what I was hoping to build. When I originally planned on making this I was going to use round sides and slats, but I decided to finally use the 1/2” wide nearly 7’ tall waste from my long stretchers. I dug through some other scrap and decided to use some cherry and red oak as the slats. The cherry was shortest, so that decided the width.
The most critical design question, in my mind, was how to make this not look so much like a ladder that a child would use it as a ladder and either break it or hurt themselves. The two ways I tried to address this goal were to make the bottom rung pretty high up (about 18”) and to have the rungs be oriented up and down, so they would hurt your feet if you put them on the rung.
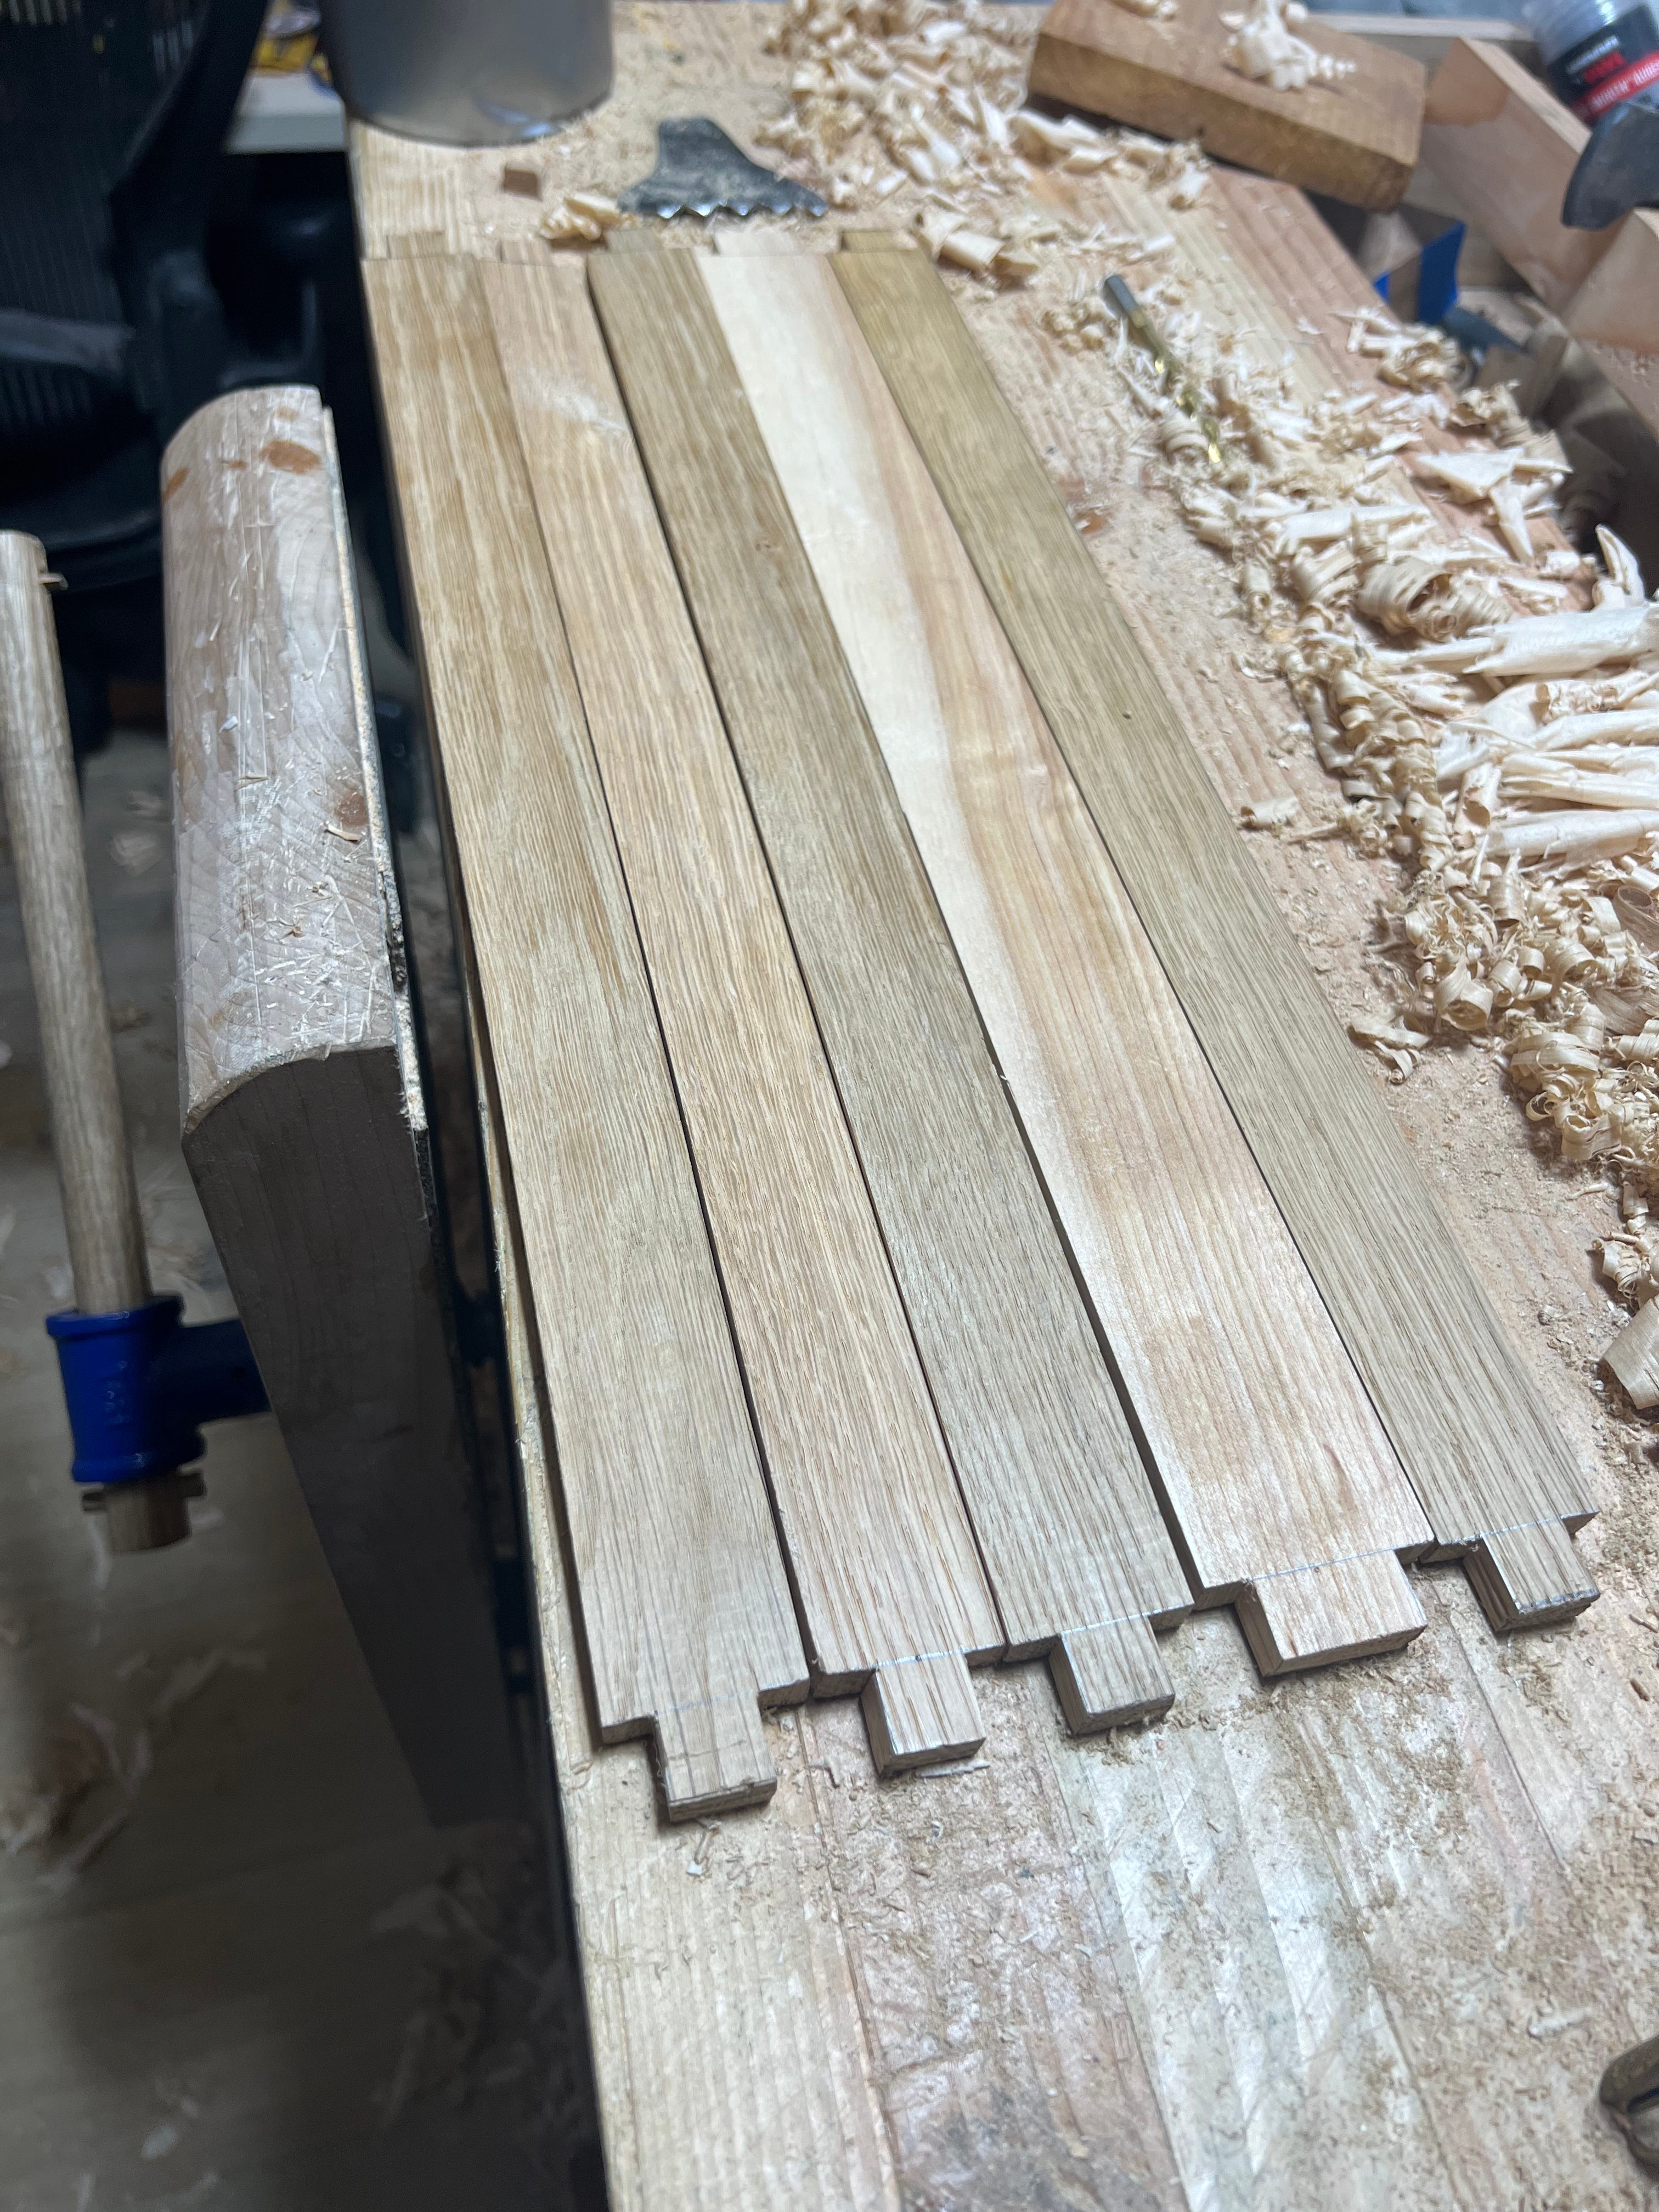
I crosscut the red oak rungs to length. Next I planed the two hard maple sides, the four red oak rungs, and the one cherry accent rung, so that they wouldn’t have any rough saw marks. I didn’t focus on squaring the work up especially and I think that was fine.


Next I did the layout. I marked off the locations for the rungs (13” between each,) and carefully marked the locations for the tops of the mortises. Then I marked the shoulders for the tenons. I sawed the shoulders of each tenon and carefully chopped the waste. Chopping out waste is always so fun. Easy, reliable work.
Once the tenons were made I used them to lay out the bottom of the mortises. This may be overkill, but using the work rather than a ruler to measure is much more likely to work out properly. As an aside I noticed that one of the slats was about 1/16” shorter than the rest. I decided that that would be within the realm of acceptable, rather than trying to get everything else a little shorter.
For the first mortise I used a 3/8” chisel, but that was probably 1/16” too wide. I don’t have a 5/16” chisel, so I used my 1/4” chisel and made the mortises a little wider the hard way. It worked out fine but took more effort. I think chopping the mortises was the most work of this whole project. A wider chisel would have helped, and so would pre-boring. I didn’t pre-bore because I have split work as narrow as this boring holes in it.


After each mortise was chopped I did a test fit till everything fit. Once all of them fit I sawed kerfs in each tenon and made a dozen wedges (a couple extras just in case.)
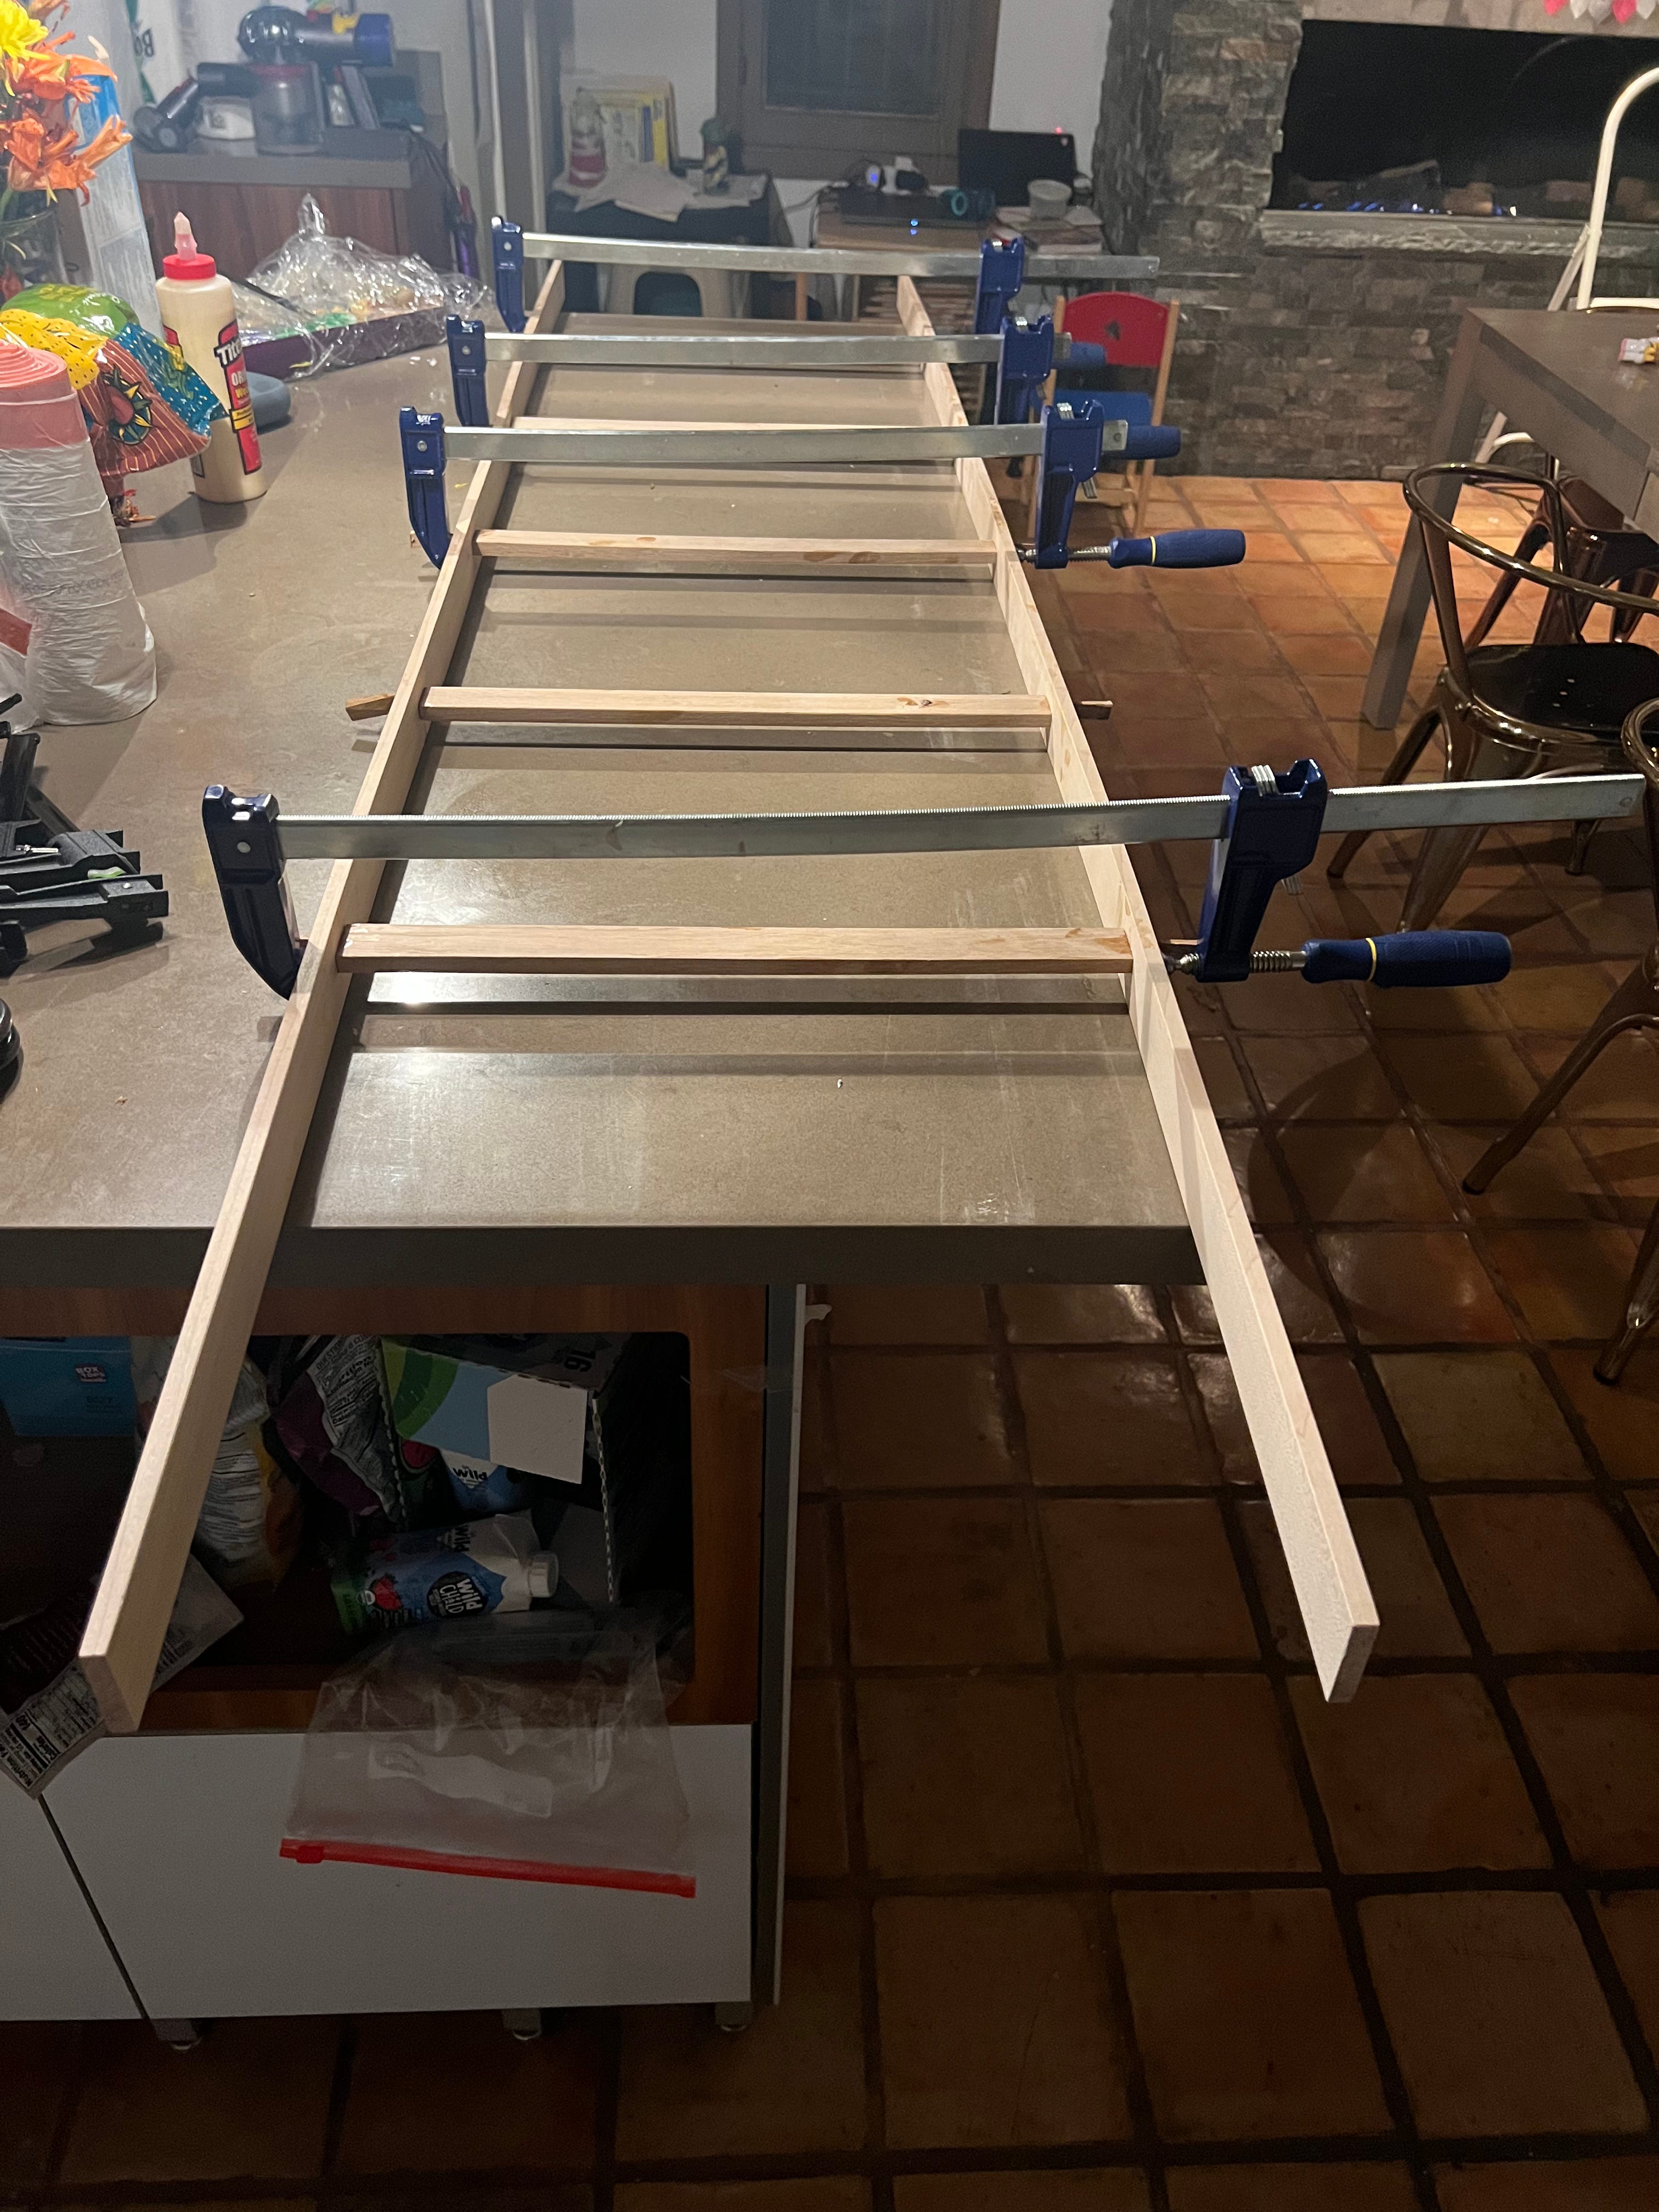
Once the kids went to bed I went to battle with glue up. I only have about five clamps for work as wide as this (about 18”) and would have preferred to have ten, but such is life. I heated up the hide glue and got to work. I smeared glue on each tenon and dabbed a bit in each mortise, got everything seated, and added the clamps. Once the clamps were in place I put glue on each wedge and drove them home.
It was as this point that I discovered the wedges were a little bit wider than the mortises. I’ve done enough wedging now that I know this isn’t crucial since wedges will break fine, but it is room for improvement. I left the glue to cure overnight.
The next day after the kids left for school I used my one Japanese pull saw to flush cut the tenons, and I used a wet rag to clean up some of extra glue. After work I planed the tenons flush and started some sanding to get it all pretty looking before adding finish.


I hate sanding. I always have and becoming more interested in woodworking has not changed that. My woodworking friends reminded me that there is a tool that removes toolmarks more quickly than sandpaper: a card scraper.
I decided to finally learn to sharpen and use a card scraper for this project. Using the card scraper was much more pleasant and effective than sanding for removing tool marks and I didn’t feel the need to wear a mask to avoid breathing in wood.


Scraping this piece was tricky. It’s almost 7’ long and it is kinda wobbly, so I have to hold it in weird ways during scraping. During this scraping the 1/16” too short cherry tenon pulled slightly out of its mortise.
Here are things that could have prevented this failure:
Make the slats the same length
Seat the wedges better (not make the wedges too wide, probably)
Make the wedges more obtuse
Use fresher glue1
Use a brush to spread the glue in the mortise; couldn’t fit my finger in to spread the glue around.
Now one reason this may have failed is because I used hide glue that was over a year old. Hide glue is more work than PVA (yellow glue) because you need to heat it up before using it, but a nice property of hide glue is that it sticks to itself and is reversible. This meant that I was able to repair the failed glue joint by preparing some fresh glue and simply re-gluing the joint. On the other hand, with PVA it may never have failed in the first place.
After fixing the failed joint, I added a few layers of boiled linseed oil to give the wood some added color.
That evening I cooked up a fresh batch of soft wax. I had attempted this before but did it all wrong, and anyway dropped the glass jar of it and so had to make more. The new batch is great. It smells good. It’s nice and soft. And it’s in a plastic container.
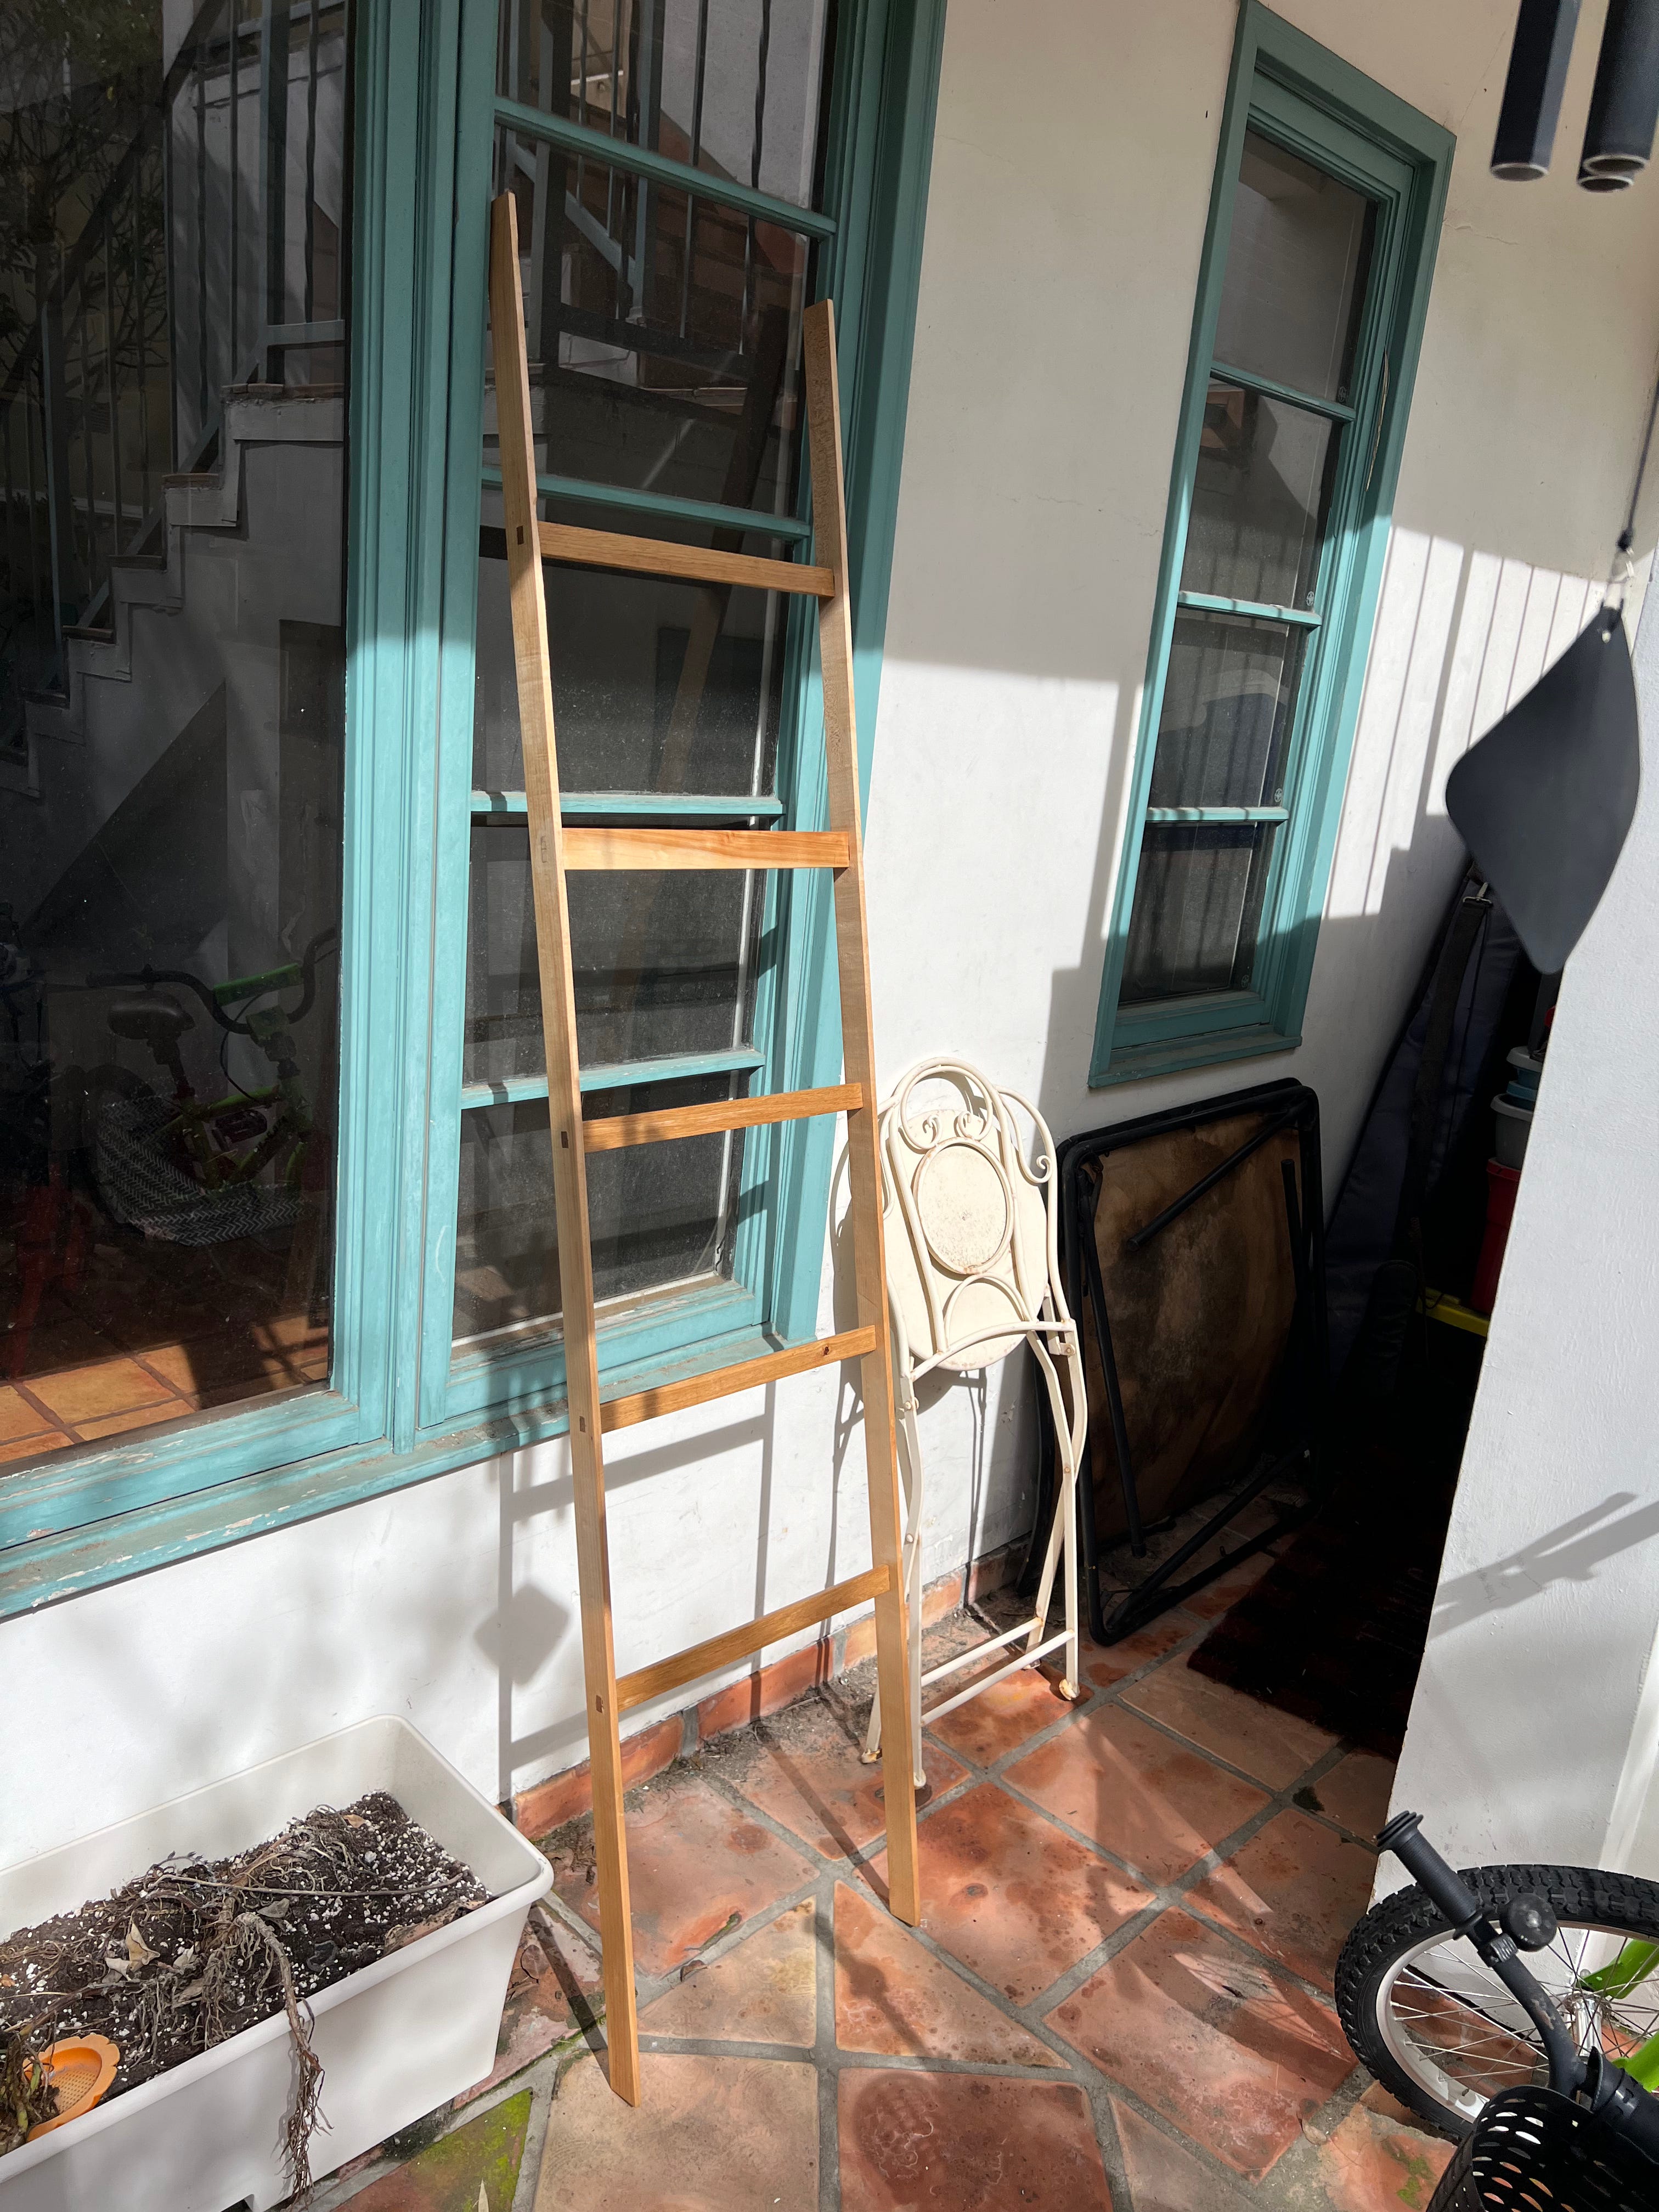
Here are some pictures of the final product:


Right after I took the drying rack out of the clamps Axel, 7, said: “Dad when I can I climb on that ladder?” 🤦
More on this in a minute
I am glad I'm not the only one who puts a bit of red stain on light wood when I am working it! 😅